

OpenAudIT-Appliance
OpenAudIT-Appliance is a ready-to-use image of an Ubuntu Server running OpenAudIT.
OpenAudIT itself is a free(GPL) opensource Application which tells you exactly what is on your network, how it is configured and when it changes.
See http://www.open-audit.org/about.php for more information
Download
|
OpenAudIT-Appliance |
How2Use OA |
Content
Installing Open-Audit is not even an trivial task. Therefore I've setup an VMWare appliance for straight forward and easy way to try out this very powerful audit solution.
Installation
OpenAudit is installed on an virtual ubuntu server 10. The ubuntu server is up to date (5.5.2012). The appliance is realised as an VMWare guest. Its hardware compatibility level is 4, so it could be run nearly under all VMWare products. It has been tested under VSphere 5, VMServer 2.0 and VMPlayer.
I'll show you how to run it under VMPlayer. You can download VMPlayer for no extra costs from:
http://www.vmware.com/products/player/overview.html
Download and install it. Download and unpack the appliance zip file and copy it's content to an empty directory.
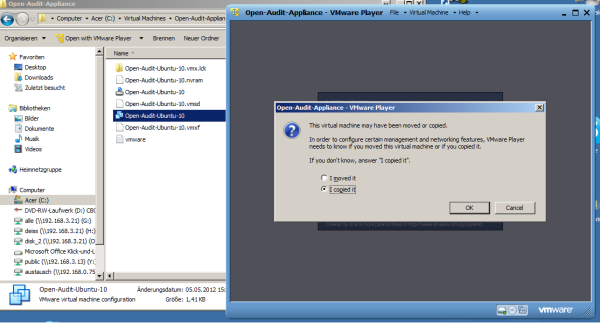
Doubleclick "Open-Audit-Ubuntu-10.vmx". Player comes up and asks if you've moved or copied it.
Important answer "I moved it" !
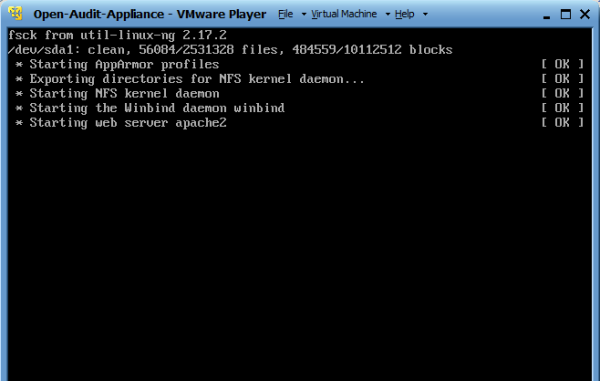
After pressing OK the machine will boot.
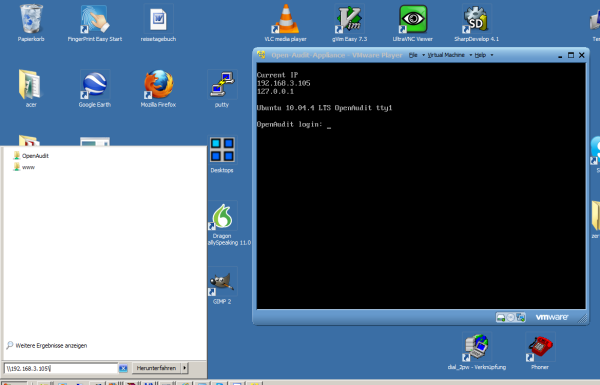
After booting you should see something like that. Note the Ubuntu machine is configured for DHCP, you should see its current IP on the screen. If you see only 0.0.0.0 DHCP is not working correctly.

Thats all, now you have an running OpenAudit server.
First Audit
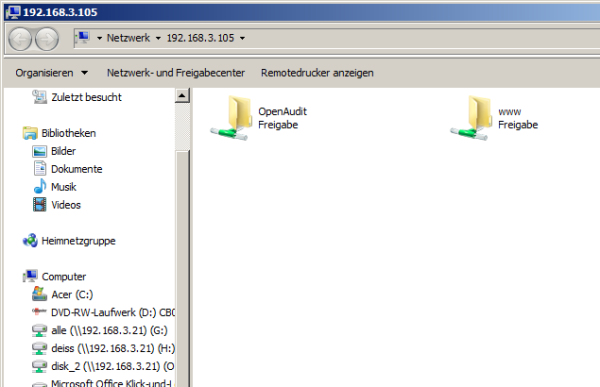
It is time to check your installation. The Ubuntu server comes with a preconfigured samba server. First let us try to access it's smb shares.
Please note: Always change 192.168.xxx.xxx to your IP which you can obtain from the running virtual Ubuntu server !
In windows enter now \\192.168.xxx.xxx\
Shares should pop up
Open the OpenAudit share, open audit.config with an editor (e.g. notepad)
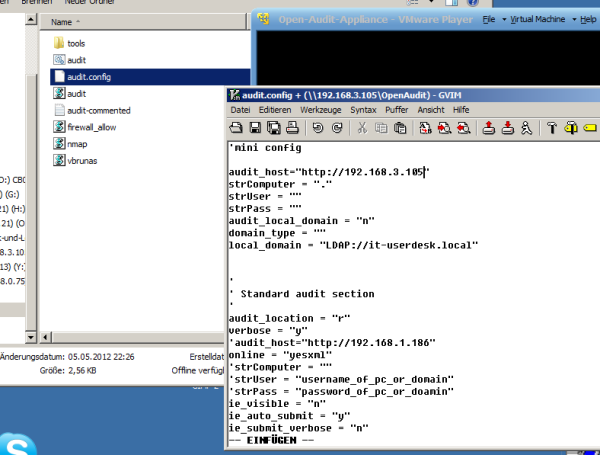
For our first try just change this one line
audit_host=http://192.168.xxx.xxx
Change the IP address to ubuntu's IP address (in our sample this is 192.168.3.105). Save file, close file, then doubleclick audit.cmd.
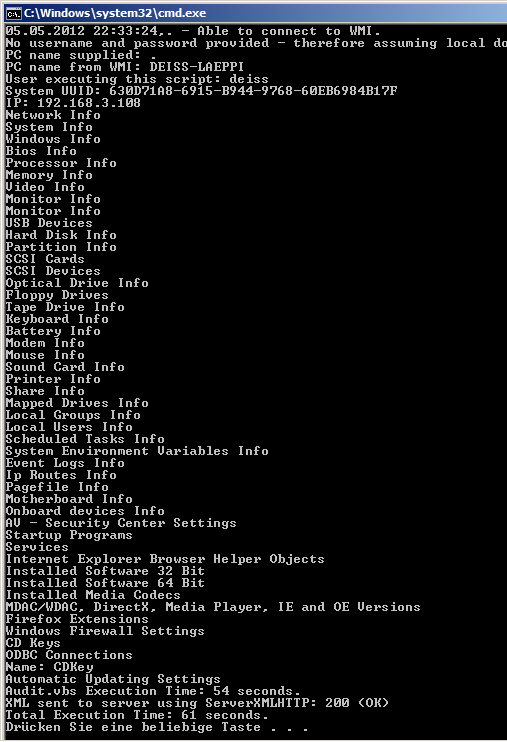
You should see a dos box, inside running the script which now collects all data from your local pc.
After gathering you should see "XML sent to ....... 200 OK"
To check the result of this operation it's time to open a browser.
Enter http://192.168.xxx.xxx/openaudit/ in your prefered browser. This should open OpenAudits Website. Now there should be one discovered system.
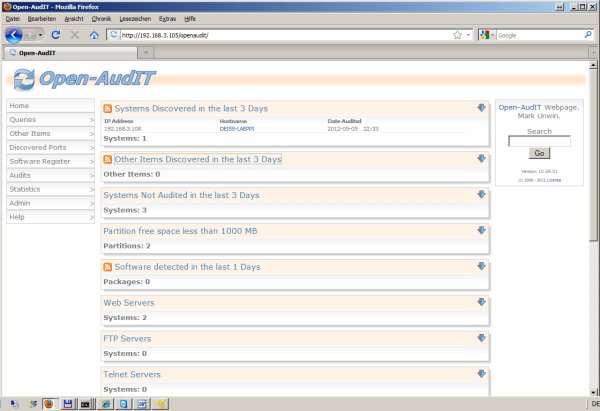
Congratulations !!
Customizing Installation
The Ubuntu server comes with a preconfigured webmin installation. With webmin you can change settings on linux machines, without knowledge of linux/ubuntu.
Enter https://192.168.xxx.xxx:10000/ into your Browser.
Enter user/password (root/password)

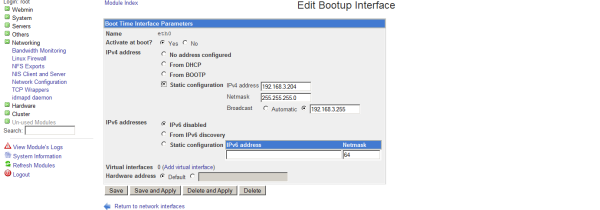
choose "Network Configuration"
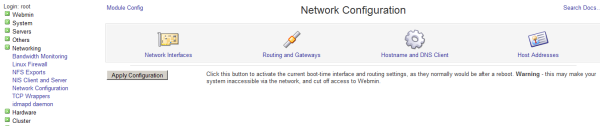
- Click network interfaces
- Choose eth0
- Change to static if you prefer fixed IP address for your Ubuntu server (recommended)
Using NMAP
OpenAudit also has an interface to nmap (optional). Nmap ("Network Mapper") is a free and open source utility for network exploration or security auditing. Many systems and network administrators also find it useful for tasks such as network inventory, managing service upgrade schedules, and monitoring host or service uptime. Nmap uses raw IP packets in novel ways to determine what hosts are available on the network, what services (application name and version) those hosts are offering, what operating systems (and OS versions) they are running, what type of packet filters/firewalls are in use, and dozens of other characteristics.
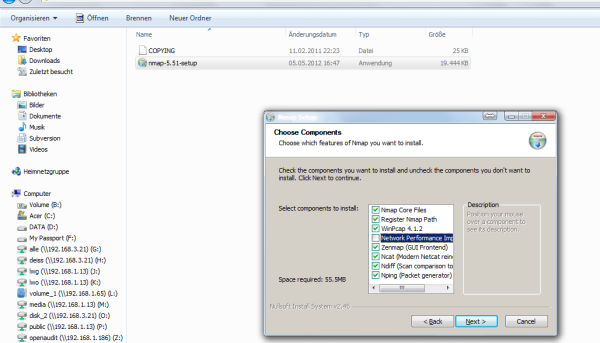
To use nmap for OpenAudit on windows you first have to install nmap executable. You'll find an installer on the openaudit share on ubuntu server. (\\192.168.xxx.xxx\OpenAudit\installs)
Open the OpenAudit share, open audit.config with an editor (e.g. notepad)
Edit these lines:
nmap_subnet = "192.168.1." ' The subnet you wish to scan
nmap_subnet_formatted = "192.168.001." ' The subnet padded with 0's
Save file and doubleclick nmap.cmd. NMAP scans your net, this will take a time .....
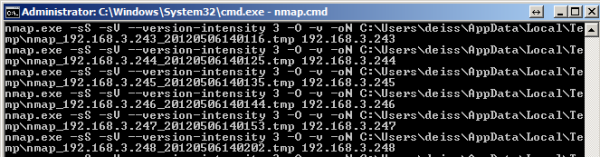
After scanning you'll find all scanned items in OpenAudits Webinterface (other items).
Passwords
You can login to Ubuntu server directly (via virtual console)
Valid users are
administrator / password
root / password
You can login to Ubuntu server via ssh (putty)
Valid users are
administrator / password
root / password
mysql login
root / password
webmin login
root / password
Appendix
Installing webmin
apt-get install perl libnet-ssleay-perl openssl libauthen-pam-perl libpam-runtime libio-pty-perl apt-show-versions pythonwget http://prdownloads.sourceforge.net/webadmin/webmin_1.580_all.debdpkg --install webmin_1.580_all.deb
audit.config
strUser = "username_of_pc_or_domain"
strPass = "password_of_pc_or_doamin"
audit_local_domain = "y"
domain_type = "ldap"
local_domain = "LDAP://yourdomain.local"
nmap_subnet = "192.168.1." ' The subnet you wish to scan
nmap_subnet_formatted = "192.168.001." ' The subnet padded with 0's
Patch to SVN
New objectmodel in IE9 requires to set compatibility mode.
include.php (line 72,added two lines):
<!-- Mimic Internet Explorer 8 -->
<meta http-equiv="X-UA-Compatible" content="IE=EmulateIE8" >
<link rel="icon" href="/cms/favicon.ico" type="image/x-icon"/>